
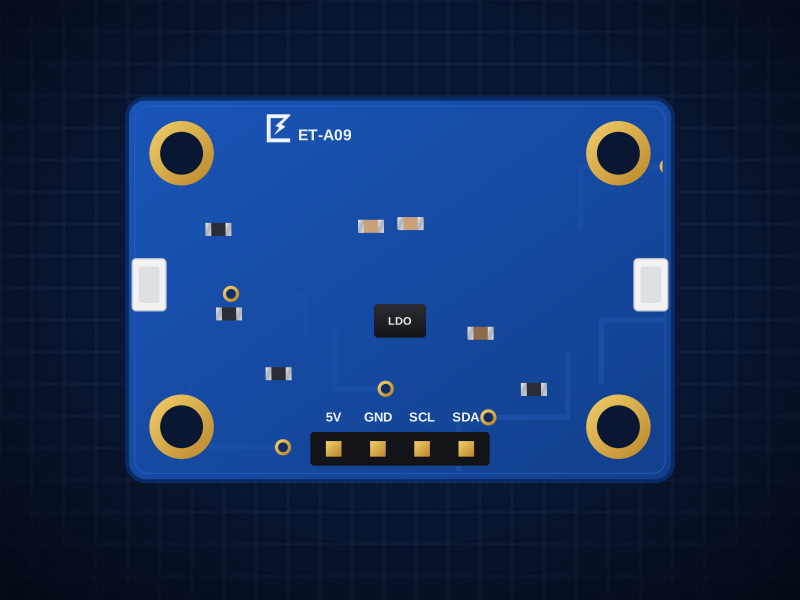
ET-A09
5V Arduino to Qwiic Adapter
Safe 3.3 V power and I²C levels for Qwiic on 5 V boards
AED 23.00
Out of stockOverview
Safe 3.3 V power and I²C levels for Qwiic on 5 V boards
The ET-A09 is built around the Connects 5V boards (Uno, Mega, Nano) to 3.3V Qwiic / STEMMA QT sensors safely.
Two Qwiic / STEMMA QT connectors let you chain it with other boards without soldering, and the 2.54 mm header fits a breadboard.
Designed in Dubai by ElectroTrical — the full schematic, BOM and design notes are published below.
Good for
- Qwiic sensors on Arduino Uno and Mega
- Protecting 3.3 V-only sensors
- Mixed-voltage classroom kits
Key features
What makes it different
Function
Connects 5V boards (Uno, Mega, Nano) to 3.3V Qwiic / STEMMA QT sensors safely
Power
AP2112K-3.3 gives the Qwiic ports a clean 3.3V, 600mA
Level shifting
BSS138 on SDA and SCL, 10k pull-ups both sides
Qwiic / STEMMA QT
Two JST-SH connectors plus a 2.54 mm header — 3.3 V and 5 V hosts.
Open documentation
Schematic, BOM and layout notes published for every board.
Breadboard friendly
Standard 2.54 mm pitch and M2.5 mounting holes.
Specifications
Technical specifications
| Function | Connects 5V boards (Uno, Mega, Nano) to 3.3V Qwiic / STEMMA QT sensors safely |
|---|---|
| Power | AP2112K-3.3 gives the Qwiic ports a clean 3.3V, 600mA |
| Level shifting | BSS138 on SDA and SCL, 10k pull-ups both sides |
| Size | 25.4 × 17.8 mm |
|---|---|
| Mounting | 4 × M2.5 holes, 2.54 mm from each corner |
| Connectors | 2 × Qwiic / STEMMA QT (JST SH 4-pin) · 4-pin 2.54 mm header |
| Revision | Rev A |
Performance
Levels
Pinout
Pin map and connections
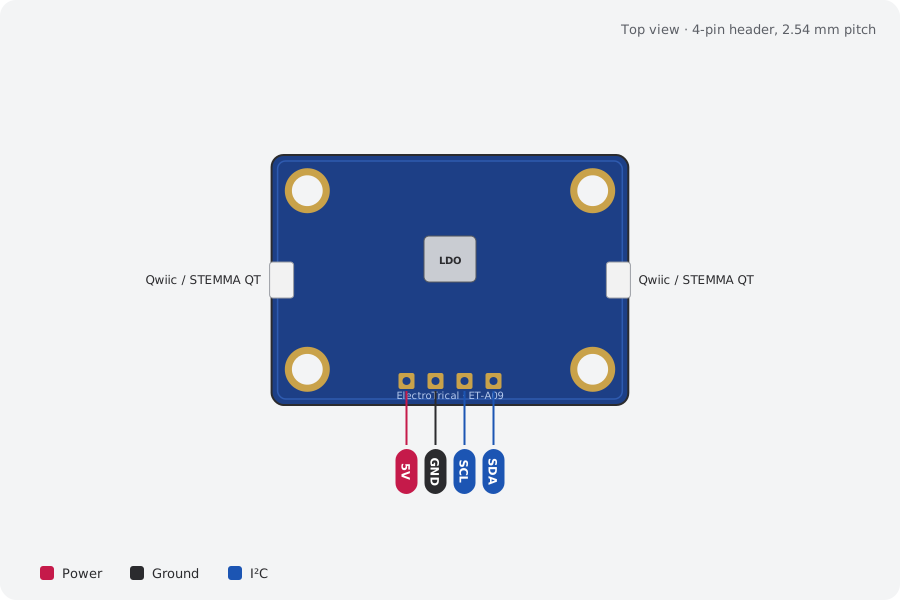
| Pin | Name | Type | Function |
|---|---|---|---|
| 1 | 5V | Power | From the Arduino 5V pin |
| 2 | GND | Ground | Ground |
| 3 | SCL | I²C | Arduino SCL (A5 on Uno) |
| 4 | SDA | I²C | Arduino SDA (A4 on Uno) |
Qwiic / STEMMA QT pins: GND, VIN, SDA, SCL (same on both connectors).
Mechanical
Dimensions and what's in the box
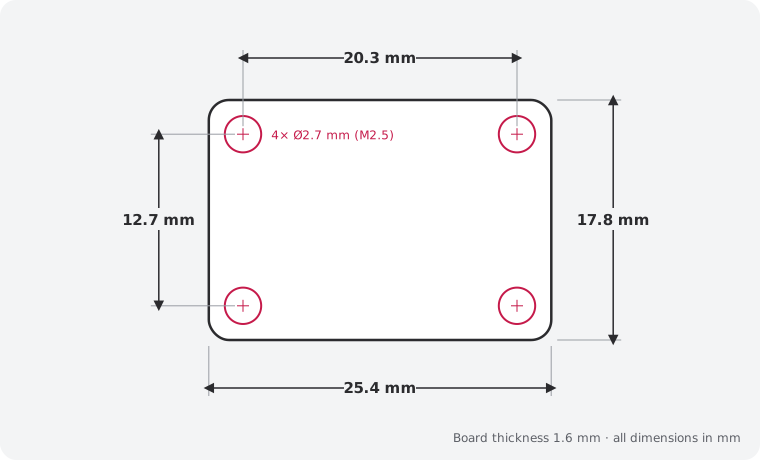
In the box
- 1 × ET-A09 5V Arduino to Qwiic Adapter (assembled)
- 1 × 4-pin 2.54 mm male header, unsoldered
Getting started
- Plug in a Qwiic / STEMMA QT cable, or solder the header and wire VIN, GND, SDA and SCL
Compare
Which I²C helper?
| 5V Arduino to Qwiic Adapter (this board)This board | ET-A01 Qwiic 5-Port Hub | ET-A02 TCA9548A I²C Multiplexer | ET-A08 Qwiic Breadboard Adapter | |
|---|---|---|---|---|
| What it does | Safe 3.3 V power and I²C levels for Qwiic on 5 V boards | Split one Qwiic cable into five ports plus a header | Eight separate I²C channels, each with its own Qwiic port | Plug Qwiic boards into a breadboard or plain headers |
| Interface | — | — | I²C 0x70 (0x70–0x77 via jumpers); Qwiic in/out +… | — |
| Best for | Qwiic sensors on Arduino Uno and Mega | Connecting several sensors at once | Several sensors with the same address | Using Qwiic sensors on any board |
| Price | 23 AED | 9 AED | 22 AED | 9 AED |
Downloads
Documents and design files
Need a custom version of this board?
Different connector, size or sensor? We design and build custom variants.