
Projects / Load cell
Digital Kitchen & Luggage Scale
A 24-bit scale accurate to the gram, with tare and calibration.
Overview
The ET-S09 is a 24-bit bridge ADC made for load cells. Pair it with a standard bar load cell and you get a scale that resolves well below a gram — better than most kitchen scales.
Swap the load cell for a 50 kg one and the same code weighs luggage. Calibration is done once with any known weight and stored on the ESP32, so it survives power-off.
- Gram-level resolution
- Tare with a button press
- One-time calibration saved in flash
- Works with 1 kg to 50 kg load cells
What you need
ElectroTrical boards
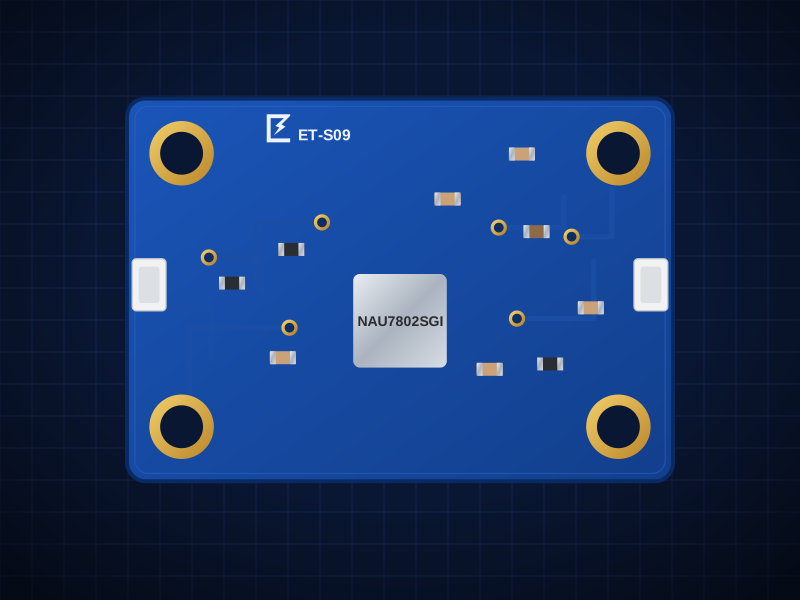
Boards total: AED 19.00
These boards are being manufactured. Open a board's page to see when it's back, or ask us about a kit.
You'll also need
- ESP32-S3 DevKitC-1 (or any ESP32-S3 board) with a USB-C data cable. Not sold by ElectroTrical.
- Bar load cell, 4-wire (1 kg or 5 kg for kitchen, 50 kg for luggage)
- Two rigid plates (3–5 mm acrylic, MDF or aluminium) and M4/M5 screws with spacers
- Push button (tare)
- A known reference weight (e.g. a 500 g bag of rice or water bottle)
Wiring
Wire colours vary between load-cell makers. If the weight goes negative when you press down, swap A+ and A−.
ESP32 → ET-S09 header
| From | To | Note |
|---|---|---|
| ESP32 3V3 | J3 VIN | |
| ESP32 GND | J3 GND | |
| ESP32 GPIO8 | J3 SDA | |
| ESP32 GPIO9 | J3 SCL |
Load cell → ET-S09 J4
| From | To | Note |
|---|---|---|
| Red | E+ | |
| Black | E− | |
| White | A− | |
| Green | A+ |
Tare button
| From | To | Note |
|---|---|---|
| Button leg 1 | ESP32 GPIO0 | The DevKitC BOOT button already does this |
| Button leg 2 | GND |
Build it
- 01
Build the mechanics
Screw one end of the load cell to the base plate and the other end to the top plate, with spacers so the cell can bend. The arrow on the cell points in the direction of the load. Only the two end blocks may touch the plates.
- 02
Wire the load cell
Connect the four wires to J4 as in the table and the ESP32 to J3.
- 03
Set up the Arduino IDE
Install Arduino IDE 2, add the Espressif ESP32 board package (Boards Manager → “esp32” by Espressif), select “ESP32S3 Dev Module” and turn on USB CDC On Boot so Serial prints over USB. Install the libraries listed above the sketch from Library Manager.
- 04
Calibrate
Upload the sketch, empty the scale and type t in Serial Monitor to tare. Place your known weight and type c followed by its weight in grams (for example c500). The factor is saved to flash.
- 05
Use it
Readings print twice a second. Press the BOOT button (GPIO0) to tare at any time.
Arduino code
Written for the ESP32-S3 DevKitC-1 with the Espressif Arduino core. Install these libraries from the Arduino Library Manager:
- SparkFun Qwiic Scale NAU7802 Arduino Library
#include <Wire.h>
#include <Preferences.h>
#include <SparkFun_Qwiic_Scale_NAU7802_Arduino_Library.h>

NAU7802 scale;
Preferences prefs;
const int TARE_PIN = 0;   // DevKitC BOOT button

void setup() {
  Serial.begin(115200);
  pinMode(TARE_PIN, INPUT_PULLUP);
  Wire.begin(8, 9);

  if (!scale.begin()) {
    Serial.println("NAU7802 not found (0x2A)");
    while (1) delay(100);
  }
  scale.setSampleRate(NAU7802_SPS_80);
  scale.calibrateAFE();

  prefs.begin("scale");
  scale.setCalibrationFactor(prefs.getFloat("factor", 1.0));
  scale.setZeroOffset(prefs.getInt("zero", 0));
  Serial.println("Commands: t = tare, c<grams> = calibrate (e.g. c500)");
}

void tare() {
  scale.calculateZeroOffset(64);
  prefs.putInt("zero", scale.getZeroOffset());
  Serial.println("Tared");
}

void loop() {
  if (digitalRead(TARE_PIN) == LOW) { tare(); delay(500); }

  if (Serial.available()) {
    String cmd = Serial.readStringUntil('\n');
    if (cmd.startsWith("t")) tare();
    if (cmd.startsWith("c")) {
      float grams = cmd.substring(1).toFloat();
      scale.calculateCalibrationFactor(grams, 64);
      prefs.putFloat("factor", scale.getCalibrationFactor());
      Serial.printf("Calibrated with %.1f g\n", grams);
    }
  }

  if (scale.available()) {
    float g = scale.getWeight(true, 8);   // allow negatives, average 8 samples
    Serial.printf("%.1f g\n", g);
  }
  delay(500);
}
Troubleshooting
Reading drifts slowly
Let the load cell warm up for a minute, and make sure nothing except the end blocks touches the plates.
Weight shows negative
Swap the A+ and A− wires, or mount the load cell with its arrow pointing down.
Different readings at the plate's edges
The plates flex. Use thicker plates, or centre the load cell under the top plate.
Take it further
- Add a small display and a 3D-printed case
- Make a coffee scale with a built-in brew timer
- Log the weight of a bird feeder or water tank over time
Turning this into a product?
We design custom boards that combine these sensors on one PCB, with firmware and production.